Saturday, December 3, 2011

Michigan Deck Builders


Here is a YouTube video of some of our recent deck building projects


Thanks for reading !

Saturday, November 19, 2011

The "outside view"

This is what all your neighbors will see of your new deck and the details here will have the most impact on the relationship between the new deck and the architecture of the home and landscape.

The "outside view" of your new dream deck breaks down into -
   Three parts:                      
        
1) Support posts,
2) Fascia/Rim,
3) Railings


I want to focus on 1) Support posts, and 2) Fascia/Rim.
 I will look at 3) railings next time.

Number one: support posts
 I have heard many complaints from homeowners about the support posts on their neighbors decks looking to small and that they looked like tooth picks in comparison to a wide deck. So here are few ideas to add some depth, design, and maintenance friendly options to your new deck.

Upgrade options to the standard 6x6 treated posts:

   
Probably the easiest method of covering the standard 6x6 support posts is to box out or fir out the 6x6 posts to a larger size and cap with them synthetic fascia. 2x4 blocking is installed to add width to the 6x6 posts so that a full 12" synthetic fascia can be used to cover all four sides of the posts.

Here is the "outside view" on this deck where the main support posts are covered and there is a triple stack fascia detail that we will get into later.


Another easy option to cover a support posts is by using pre-fab columns. In the picture: we used pre-fab composite or poly columns that mimic the look of stack stones.


The next picture is of a deck and pergola where we used pre-fab poly stone columns
along with round poly columns to cover to the treated 4x6 support posts. We built blocking boxes for the railing attachment. The stone and round columns are just basically covers to enhance the design.


Here is another picture of this project in progress - as we are building the pergola, even though it is not under the deck it still is the same principal where the 4x6 wood supporting post for the pergola run right through the columns.

The top of the line option is real masonry columns to cover the main support posts. We have lost all of our masonry brick and stone deck picture's when our last computer crashed.  These picture were borrowed from the Internet. With the brick and stone the options the only change will be larger footing sizes to support the brick or stone veneer.


2) Fascia details

This is one of our favorite details and one that really can add beauty and depth to your new deck. This fascia is what covers the joists and or the beams of a new deck.
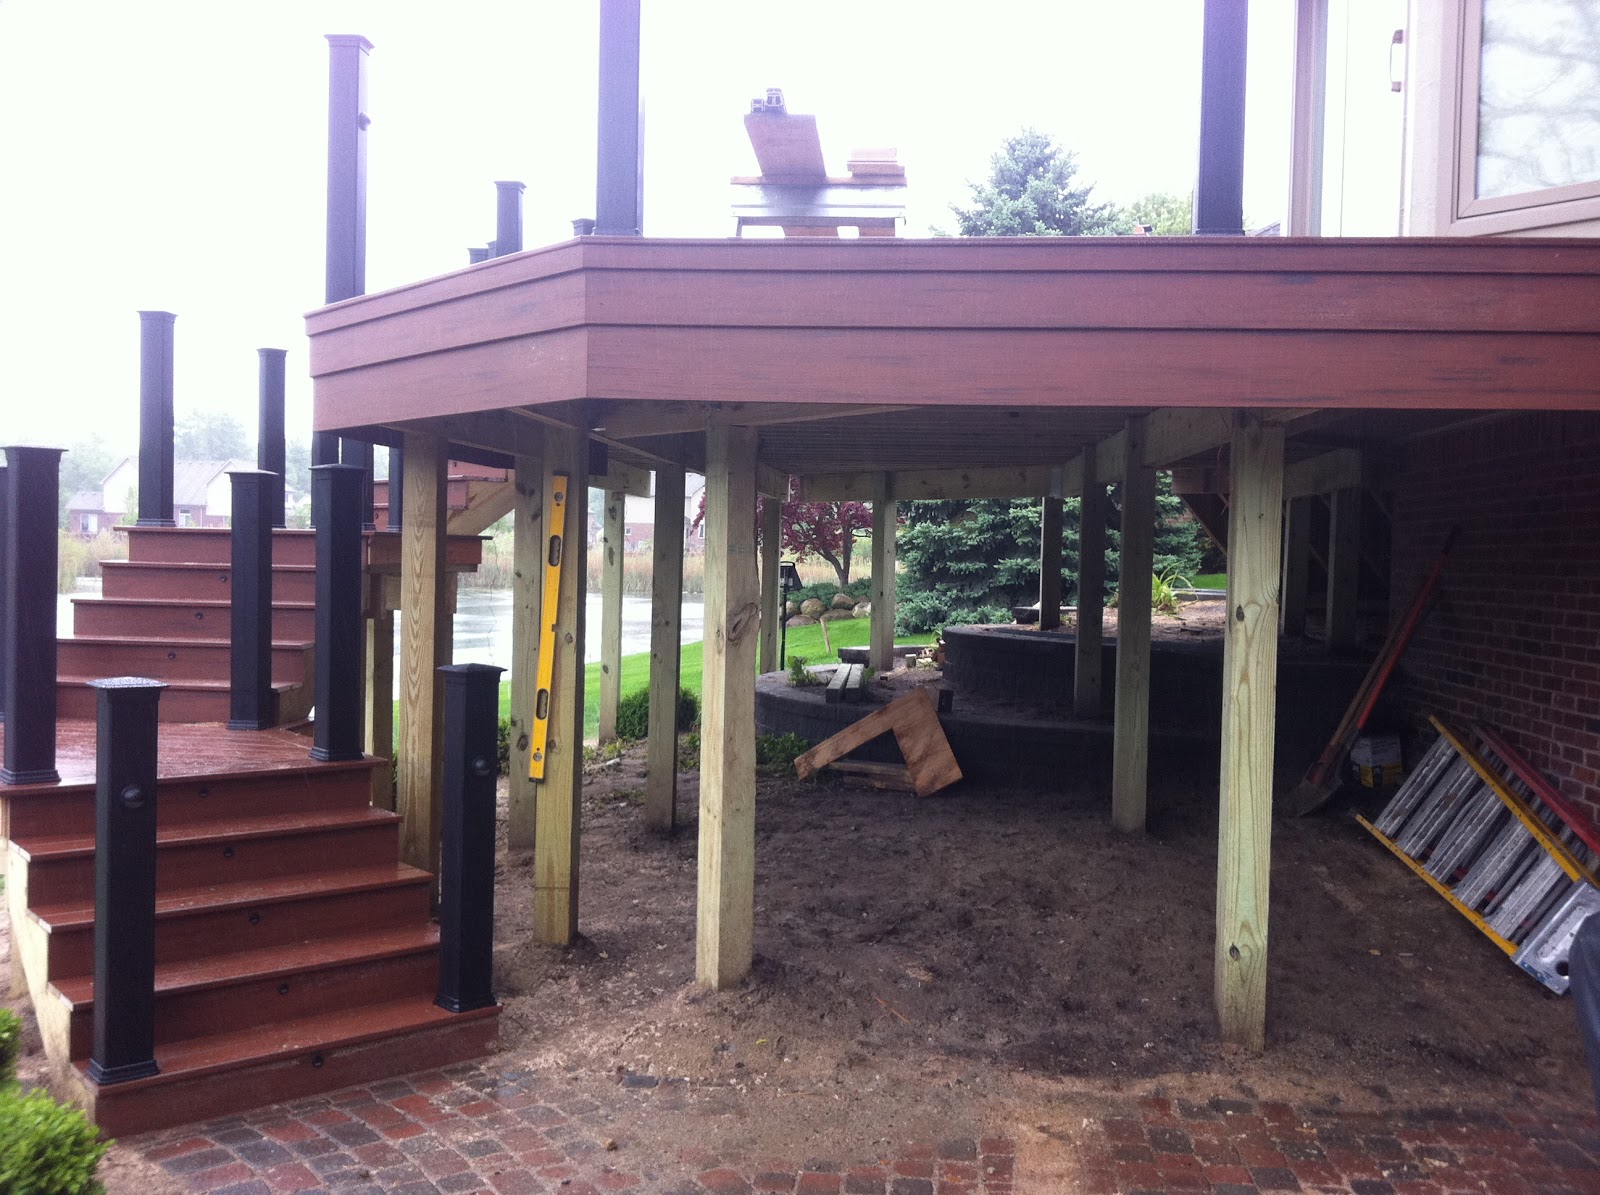
Here in the "outside view" picture below you can see the deck building in progress. We are just about to finish the railings and move onto the fascia, you can see the little plywood blocks that are applied to the deck rim joists, and we are about add another rim joist below the upper rim joist that is at the joist level to support the triple stack.

In the picture below you can see the progress, the lower platform deck for the stairs is complete and the upper deck level has the bottom 12" fascia course applied only. We then rip a 12" down to 8" 1/2" and we use the 3" 1/2" rip for the top tier, so they just stack on top of each other which not only covers the joists but the beams also. 


Here is what the final detail looks like.


Here is some other deck projects where we have done triple stack fascia details.


Our standard fascia detail is a two tiered fascia that just covers the rim joist.
Notice how you can still see the beam, this a more budget option, or what you would use on decks that are closer to the ground level.


Here is a couple picture of fascia details on wood decks.

A cedar deck with triple stack fascia with solid skirting


Double stack cedar deck


Thank you for reading !


Sunday, October 2, 2011

Shelby Twp. MI composite deck

It has been a crazy summer and we have had the busiest year of our company. I again have to apologize for not keeping up with the blog !
 I hope to keep up with this now that summer is gone and the Michigan deck builders season is quickly coming to a close.

Here is our second featured project of 2011

 This is a tear down of a 15-20 year old cedar deck and replacing it with a Timber Tech evolutions cap composite deck. We worked with the homeowner for about eight months getting all the design & pricing options worked out. They were also waiting for a wedding party they were have in late spring, and they wanted a brand new deck ready for their party.

Here is the before picture and the framing design layout. Notice the existing retaining we had to build around !
Once the old deck is removed the process begins with digging the posthole footings again we had to go all around the existing retaining walls

The other big challenge on this project was the stairway on east side of the deck that had two landing that wrapped around the upper level. Layout on the landing/strings have to be with 3/8s of an inch over the complete run of the stairs. We also had to end the stair right at the paver patio below.


Here is picture of the decking layout, with the double center seam board, double picture frame border, and the decking running on alternate 45 degree angles. The decking Timber Tech evolutions in the rosewood color
 Next we are onto the railings & fascia. The railing is black Timber Tech custom Radiance rail with deckorators estate balusters with collar centerpieces on every other baluster. In the pictures below we have just finished installing the newel posts, and we have just started our first railing section.

Some other features on this deck are the triple stack fascia detail and the 40 Trex low voltage lights.

Here is a few final pictures


Friday, July 15, 2011

Romeo MI composite deck

It has been to long since we have updated our blog .. I have to apologize !
 It has been hard to find time we have been busy building decks.

Today we are going to review a project we started last November.

We framed the deck last year and the job was put on hold until early this spring when we finished up. We were originally hired to only design the deck. Then we were hired to frame the deck, and the customer was going to finish the deck. After further considering the scope of the project we were then hired to finish the deck this March.

Here is the design that was revised some this spring.
The deck was designed to be a temporary access to the above ground pool which will eventually be removed. So the deck will have to look good when the pool is removed.
The design also has a unique center section with a dodecogan triple picture frame border. 
Here we had to build a jig out of wood decking to get the proper layout of the dodecogan (12 sided octagon) This was a challenge to keep everything square and all the mitres tight ! Originally the deck was only going to have a double picture frame border, so we had to add more blocking.

The decking is the new Timber Tech Evolutions rosewood (cap composite) with Timber Tech XLM sandridge borders, fascia, and railings. Here we are installing the decking and borders.
We tried tying in the colors of the decking, fascia, and railings with trim and brick colors of the house.

From the outside, the deck looks all the sandridge color like the color of the house trim and once you are on the deck surface we tried to pick up the brick color with the rosewood decking.
A picture of the triple center seam board and triple border dodecogan.


The railings are Timber Tech Radiance rail in sandridge with bronze Deckorators balusters. The two rail sections over the pool are removable to access the pool.


Here are few more final pictures