Hello again from Michigan ... The
deck building season is quickly coming to an end, so we have a little more time to update our blog.

The growing trend of deck "Re-covers"
A topic I have been meaning to write about is Re-covers. Because we see a lot of companies recommending "Re-covers" on decks that need to be completely torn down. Especially when your considering a synthetic material that has a 25 year warranty. You could be asking for the old deck frame to last 40-60 years.
Deck builders in Michigan call them "Re-covers" This is where you have a good deck frame but the decking/railings needs to be replaced because of aesthetics or rot. Mainly for budget purposes and in some cases the old framing is better wood then the new treated wood we get now. Usually the frame should be no older then 20 years and at most 30 years in my opinion.
When we are on estimates where customers have an existing deck that might be a candidate for a "Re-cover" We do a extensive inspection of the support posts, ledger board, spans of the framing members, the condition of the hardware and flashing.
This should be done with the intent to get the full lifespan out of the new "Re-cover materials. I have seen projects that were "Re-covers" that have gone bad within 2-3 years after being done because there was not careful consideration done with inspection/planning of the "Re-cover" and how the framing materials will hold up and how the old deck was built. This can be a costly mistake for a contractor/homeowner
1) Inspect the support posts:
Check for rot at grade level or just below grade level on deck where the support post are sunk in the ground. The support post length or upwards span can be an issue with older decks, there was not a lot information on the allowances for 4x4, 4x6, and 6x6 post height. In my opinion 4x4 support posts should not be more then 4' above grade. We use 6x6 support posts on all of our new decks. Check the post/beam attachment - on many old decks the beams are bolted to the sides of the support posts which is frowned upon now unless your using special hardware for that type of connection. Nowadays the code really leans towards the beams bearing on the support posts by either notched into or sitting directly on top of the posts.
2) Inspect the ledger board:

Make sure the ledger is properly bolted to the house rim with either lag bolts or carriage bolts. Safely you should have 1/2 galvanized bolts every 12". On the old deck watch out for cement anchors bolted to a brick veneer that is not code and should be addressed. Note: - no longer in the code are you allowed to attach a ledger through brick veneer even with the proper bolts. The other thing to check on the ledger is proper flashing, this is usually never done. There is different techniques for different exterior wall materials, brick and stucco being the most difficult to do properly and siding being the easiest.
3) Inspect the framing spans:
The joist span is the first thing I look for to have proper decking size. Most all 5/4 decking is rated 16" on center joist framing at 90 degrees or perpendicular to the joists. A lot of decks in our area have either 24" on center joist framing and they used 2x decking or they have 16" on center joists with 2x decking running on 45 degree angle. With both examples re-covering with 5/4 decking cannot be done unless you add extra framing or you stick with 2x decking. Remember most synthetic decking is 5/4 and rated for max span of 16" on center joist framing. Another thing to watch out for is the spans of the joists/beams a good reference guide for treated wood is the
DCA6.
4) Inspect the hardware/joist flashing:
This is an obvious one but you should check and your bolts and hangers for corrosion and proper installation. We also flash all the tops of the old deck joist with a peal and stick membrane. This will help give longer life to the old joist and also help with any water damage through the old nail penetrations in the joist.
One other thing I forgot to mention is the condition of the footings, this is usually evident by how level
the deck is. In Michigan we have a 42" frost depth so if your deck is raised up and out of level in areas, your footings have heaved from the frost. Two main points with pier or post hole deck footings is proper depth below the frost line for your area, and make sure you bell shape your footings with the bottom being the widest and top being the narrowest this taper angle will not allow the frost to catch a footing and pull it up. Another issues you might see in older decks is sinking footings/posts this is usually due to - to small of footing width the
DCA6 is another good place to look for proper footing size for your deck.
Here you can see the peal and stick
deck flashing membrane that covers the old deck joist, and then we start installing the PVC decking with hidden fasteners.
Once the Timber Tech XLM Harvest Bronze decking is installed we will move on to the railings
The railings are Timber Tech Radiance rail sandridge and mountain cedar colors, with post cap lights
Here you can see the complete fastener free surface with the Cortex plugs that are used on this deck
Here are a few final pictures
Thanks for reading
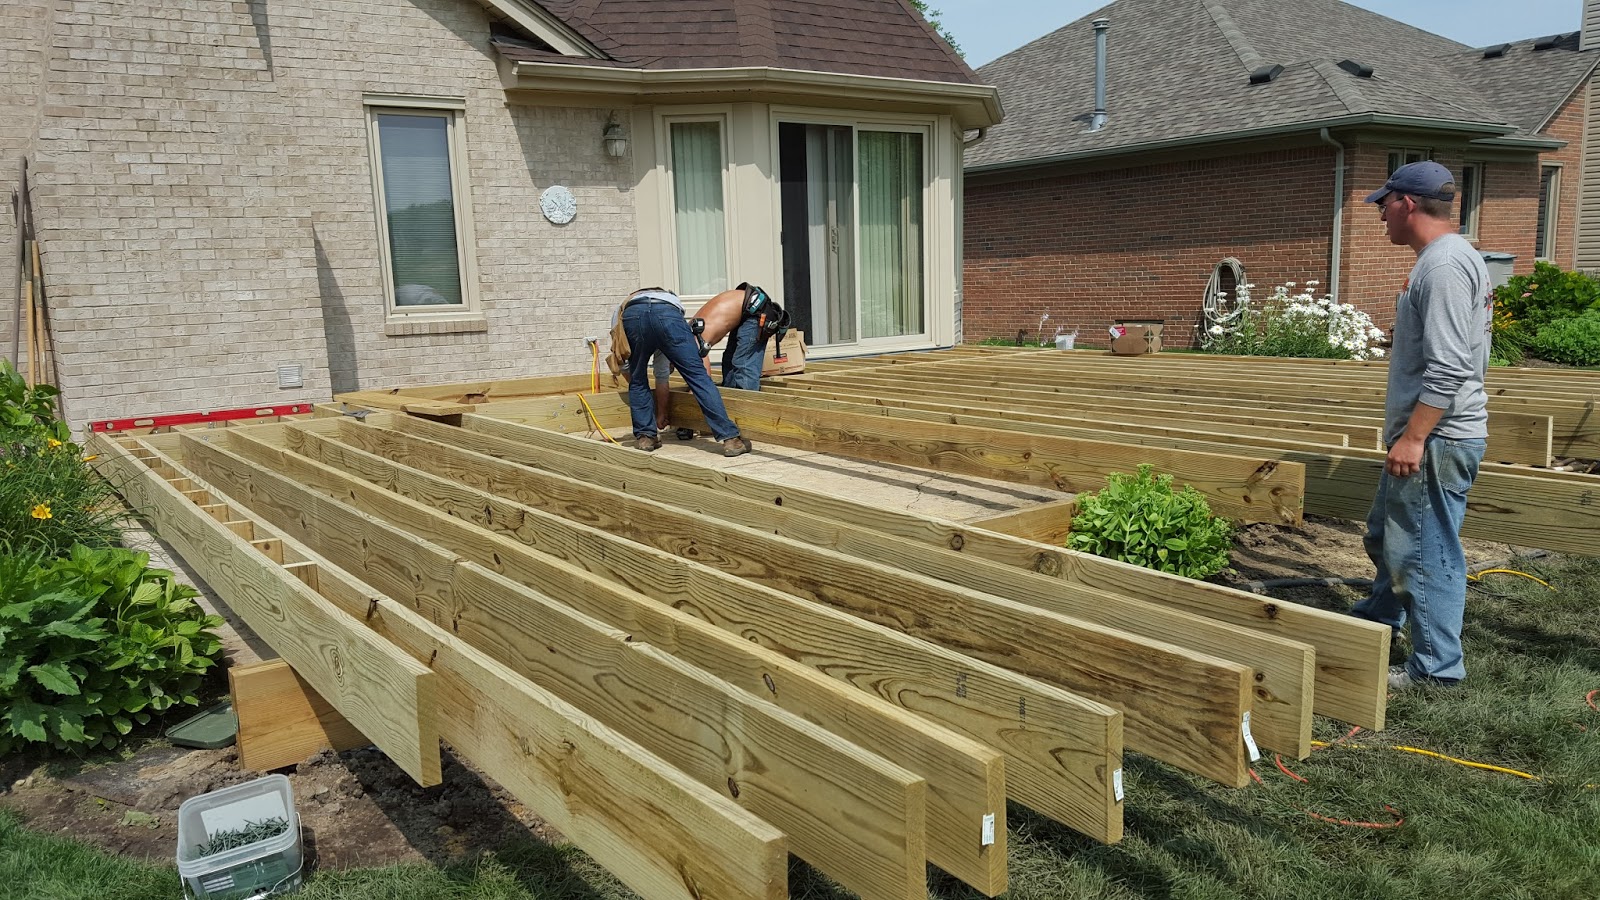


 So the only choice here for the middle beam is to have it at the joist height. It is done the exact same way as a drop beam only the joist are all supported by joist hangers. This middle beam works only because we have a ledger attachment everywhere except where the fireplace chimney is located. We have engineered plans that allows us to attach to a cantilevered bay and through a brick veneer for spans under 6'


.jpg)
.jpg)


